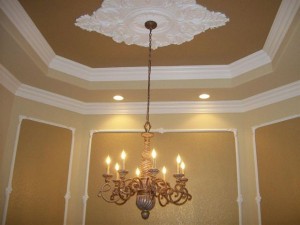
 Crown molding adds a finished, formal touch to any decorated room. Purely decorative in nature, this elegant molding presents a dramatic look to the room and contributes an air of elegance and flair to any house. It is that graceful, finished strip of wood which can be found at the tops of some interior walls evidencing a break between the room’s wall decoration and the beginning of the ceiling itself. A feature installed merely for looks and not at all structural or load bearing in nature, this decorative device has been in use for centuries in fine homes.
Here are a few tips and observations about how to install crown molding:
• Crown molding installation is not a job for the novice. It is important to learn which side of the crown goes up before you attempt installation, and that you learn how to properly cut the molding to achieve the desired look. Properly cut crown molding and installing it so that “up is up” is what makes the molding installation look elegant when the installation is complete.
• If you are not familiar with using an electric saw, enlist the help of a friend who is! Many of the installation techniques may involve using a saw in an upside-down position; this trick should not be attempted by someone unfamiliar with saws in the first place!
• Be aware that installing crown molding is more than just measuring pieces of molding and nailing them onto walls, if you want to get the true crown molding effect. Proficient installers use a miter and a bevel to achieve the elegant layered effect that most consumers associate with expertly-finished crown molding. Those techniques potentially involve some of the upside-down sawing with a power saw that was referenced above.
• Installation of crown molding is not a task for amateurs! Use care when undertaking the procedure! Watch out with that power saw on the ladder! Here are some tips to get out any scratches in your hard wood that may occur during the process of adding the crown molding.

This picture is gorgeous. I am using it to design my master bedrooms’ crown molding. I would love to know what two paint colors where used in this room?