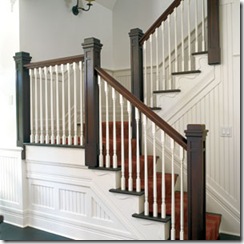
Wood stair banisters generally consist of one or two handrails and several supporting “newel” posts. Over time a stair banister may become weak and can result in a loose handrails or post. To tighten a stair banister lose parts, you may need to insert wedges or screw loose parts for a tighter fit. If your using screws or pilot holes to prevent the wood from splitting, use an electric drill with combination bit so you can sink the screw heads. To conceal the screws or pilot holes, fill the holes with wood putty, preferable colored to match the wood and sand the putty smooth.
Two Ways to Tighten a Stair Banister Handrail:
- Wedges: Tap a glue-coated wedge between the stair handrail and post. Make sure you do not pry the stair handrail. With a utility knife, trim the wedge flush with the handrail.
- Screws: Drill a pilot hole at an angle through the post and into the stair handrail. Counter sink the screw and then apply wood glue. Insert the screw and then tighten. Fill the hole with wood putty, sand, and finish.
Two Ways to Tighten a Stair Post:
- Nail to Treads: Drill a pilot hole at an angle through the stair post to the treads (stirs). Countersink the hole. Insert a wood screw and then tighten the screw. Once you have tighten the stair post and had filled the hole with wood putty, allow the putty to dry then sand and finish.
- Notch-and-Tenon Post: Using a putty knife or chisel, pry the molding off. Then follow the steps for a nail to treads above, except do not fill the hole with wood putty. Instead apply epoxy around the notch and tenon. Insert the screw and tighten the stair post. Once you have tighten the banister to the post replace the molding.
